
One thing I disliked about my city building scene the last time around was that after spending so much time on the building itself, I was too lazy to make the plant models myself that I used to decorate the balcony with. So I wanted to make a separate balcony scene and focus on making my own models of plants and flowers. This turned out to be a massive undertaking, much more than I had expected. I had to research plant species, find lots of reference photos, and limit myself to textures that were available to me.
The plants and flowers still aren’t anything that would look great really close-up but work well enough at these sorts of medium distances I think. But by then I had spent so much time on the plants and the accompanying props that I simply half-assed it with the surroundings. Finding a city-based HDR that could match the look and the scale proved impossible, so there’s no real background either. I did some experiments with color schemes and lighting and I think this setup looked the most interesting.
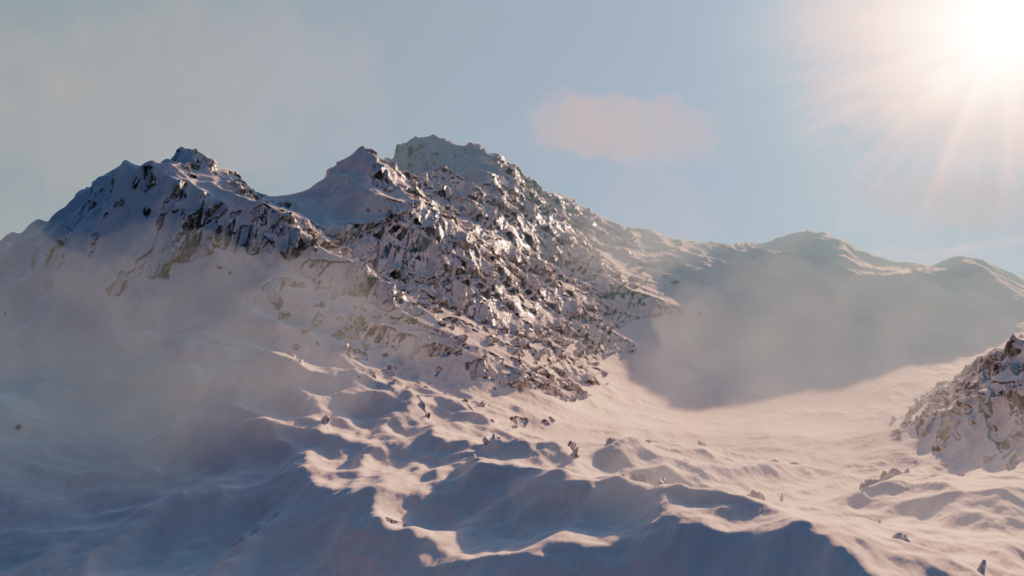
Next is a landscape exercise from CG Geek, whose channel I’ve been watching with increasing frequency. This looks amazing but it’s embarrassing how little work it requires. The basic terrain itself is generated by the ANT Landscape add-on and after that it’s a matter of mixing a snow texture and a rock texture together. The CG Geek guy, Steve Lund I think, uses a clever procedural technique to separate out the faces that are pointing sideways and the ones pointing upwards to determine which areas should be snow and which areas should be rock but I think a good artist should be able to do better with manual painting. There’s a lot of tweaking and fiddling around with the settings to get everything just right but the shaders and model itself need very little work.
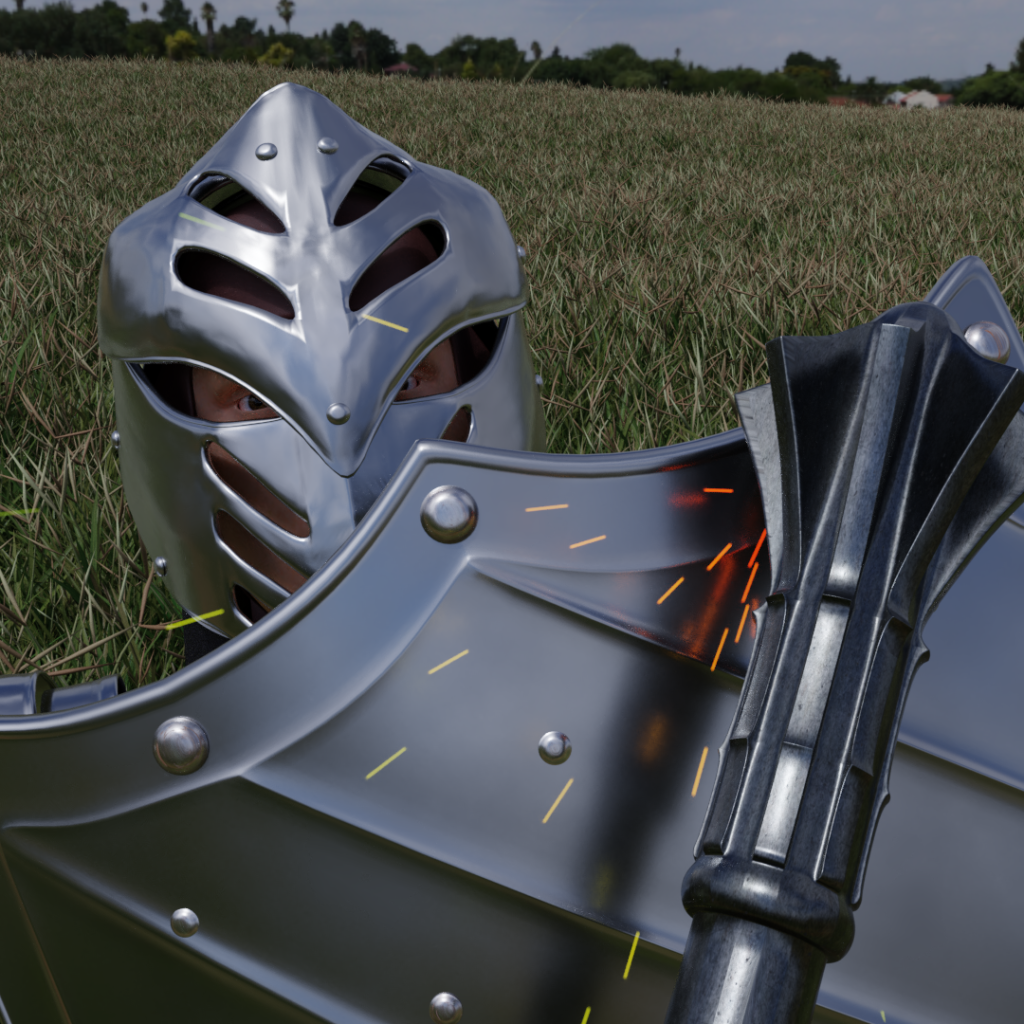
Another thing I’ve been doing is following along with Riven Phoenix’s human modelling tutorial. Only the first few videos on YouTube are free but I liked them so much I bought the whole series on Steam. I don’t think it actually counts as learning however as his instructions are so precise that you end up with exactly the same model he does so it might as well be like downloading the model. While you do make it yourself and that might well make it easier for you to modify it in the future to suit your purposes, it’s impossible for anyone to use this knowledge to build another model. Coming up with this must have required years of experimentation, intimate knowledge of human anatomy and a lot of experience in understanding how to the topology of models. It does make for a pretty good advanced modelling course, especially the tricks with rotating edges to retopologize as needed and using smoothing to create more organic-looking shapes. Watching this only made me realize how much more I still have to learn.
I’ve only done the head so far but I thought I’d quickly throw it together with some of the other assets I’ve made, plus an eye model, for a render. I soon realized how wrong the proportions of my helmet are the other armor pieces. The course doesn’t include textures or materials so that’s something else to learn as well. Even so having an actual human model so that I can build properly scaled armor pieces and other objects around them is very useful. I notice that very few Blender artists use human subjects much, because it’s so much work to achieve photorealism. I’d want to play around with this on and off but I wouldn’t want to focus too much on this either.
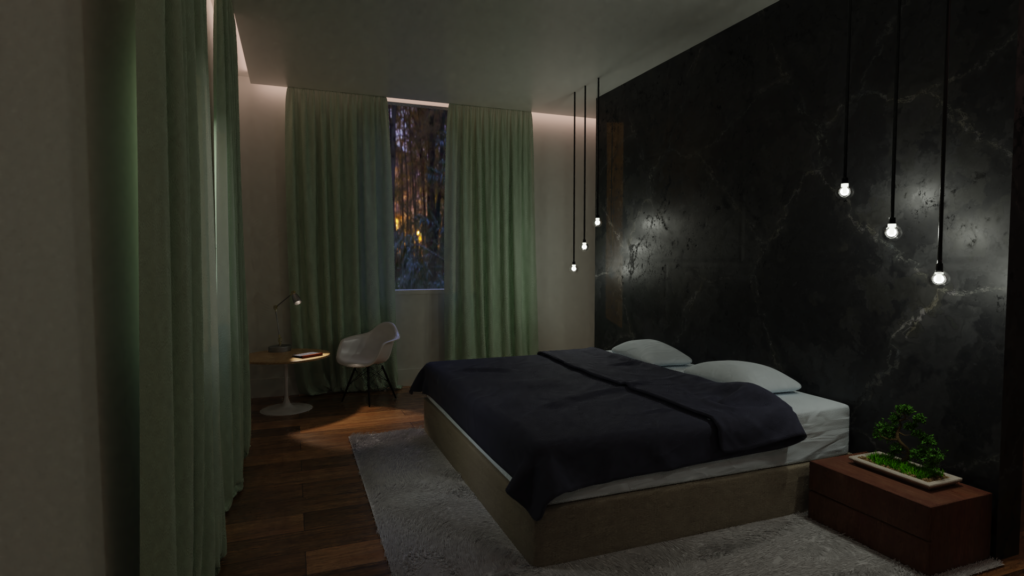
Finally here’s a nice old-fashioned interior decor scene, another exercise from CG Geek. These things aren’t too difficult to make, with the only challenging part being the cloth simulation which can be tricky to make it look right. However I always have tons of problems with fireflies when rendering these interior scenes with multiple light sources and have to ramp up the clamping settings to get them under control. The actual exercise uses Blender 2.8 and the new EEVEE real-time rendering engine and so doesn’t have firefly problems.
I have yet to download and play with 2.8 however as I usually don’t use beta software. It’s going to be a huge change between the interface improvements, EEVEE and so on so that’s going to be another big time sink once I get around to that. I should make more of these interior scenes though as they’re not that hard and look pretty nice.